0%

NexT테마에 설치시 개인적 변경 내용

NexT테마

NexT테마는 hexo테마 중에 요즘 활발히 움직이고 있는 테마 같습니다.

몇번 전체를 둘러 보지만 “ 와 ~ “ 라는 소리가 나올 정도로 잘 만든 테마로 한참을 찾아야 되는 부분이 많은 것 같습니다. 또한 이 테마는 자주 업데이트가 이루어 져서 매번 업데이트 하고 보면 어디를 수정했는지 몰라 또 한참을 찾아야 하는 번거러움이 있습니다. 이를 정리하고자 이렇게 포스트 한번 적어 봅니다.

1. 큰 화면에서 메인 부분 고정하기

Blog\themes\next\source\css\_variables\Pisces.styl “Pisces.styl”파일을 열어 14번째 줄을 수정합니다.

1
2
$content-desktop-large        = 1160px;
$content-desktop-largest = 73%;

위의 73%를 1160px로 수정합니다.

1
2
$content-desktop-large        = 1160px;
$content-desktop-largest = 1160px; //73%;

혹시 몰라 73%는 남겼습니다.

2. 헤더 파일을 열어 css파일을 추가 합니다.

Blog\themes\next\layout\_partials\head\head.swig “head.swig”파일을 열어 마지막 줄 밑의 내용을 추가합니다.

1
2
3
<link rel="stylesheet" href="{{ url_for(theme.css) }}/v8_etc.css?v={{ version }}"/>
<link rel="stylesheet" href="{{ url_for(theme.css) }}/inks_bootstrap.css?v={{ version }}"/>
<script src="{{ url_for(theme.js) }}/innks_data_next.js"></script>

3. 사이드바에 내용을 추가합니다.

Blog\themes\next\layout\_partials\sidebar\site-overview.swig “site-overview.swig”파일을 열어 마지막 줄 밑의 내용을 추가합니다.

1
2
3
4
5
6
7
8
9
10
11
12
13
14
15
16
17
18
19
20
21
22
23
24
25
<!-- 애드센스 -->
<div class="ads_side">
<script async src="//pagead2.googlesyndication.com/pagead/js/adsbygoogle.js"></script>
<!-- innks side_bar -->
<ins class="adsbygoogle"
style="display:inline-block;width:234px;height:60px"
data-ad-client="ca-pub-2415402928090831"
data-ad-slot="7916591618"></ins>
<script>
(adsbygoogle = window.adsbygoogle || []).push({});
</script>
</div>
<!-- 애드센스 -->

<div class="widget-wrap-counter">
<a href="https://info.flagcounter.com/CmUL"><img src="https://s09.flagcounter.com/count2/CmUL/bg_ffffff/txt_555555/border_ffffff/columns_3/maxflags_3/viewers_3/labels_0/pageviews_1/flags_0/percent_0/" alt="Flag Counter" border="0"></a>

<div class="ads-right">
<script id="_wau2bi">var _wau = _wau || []; _wau.push(["small", "rfw5n8j3qpuq", "2bi"]);
(function() {var s=document.createElement("script"); s.async=true;
s.src="//widgets.amung.us/small.js";
document.getElementsByTagName("head")[0].appendChild(s);
})();</script>
</div>
</div>

4. _config.yml 을 열어 수정합니다.

이 부분을 열어서 예전것이랑 비교하여 수정합니다.

4-1. 검색 부분

이 부분은 여러 가지 사용해서 무엇이라 적기는 힘들지만 NexT테마는 ‘hexo-generator-search‘을 사용하는것 같습니다.

1
$ npm install hexo-generator-search --save

_config.yml파일의 Local Search부분에 수정 해야 합니다.

1
2
3
4
5
6
7
8
9
10
11
12
13
# Local Search
# Dependencies: https://github.com/theme-next/hexo-generator-searchdb
local_search:
enable: true
# If auto, trigger search by changing input.
# If manual, trigger search by pressing enter key or search button.
trigger: auto
# Show top n results per article, show all results by setting to -1
top_n_per_article: 1
# Unescape html strings to the readable one.
unescape: false
# Preload the search data when the page loads.
preload: false

5. 기타 - ‘움직이는 배경 사용하기’

이 부분은 해도 되고 않하셔도 되는 정말 기타 부분입니다.
마우스 따라다니는 점들을 하는 것이고 또한 ‘Gemini’테마에는 잘 보여지지도 않더군요. 필요한 분만 사용하시길 바랍니다.

1
2
$ cd hexoblog/
$ git clone https://github.com/theme-next/theme-next-canvas-nest themes/next/source/lib/canvas-nest/

뒤에 themes/next/source/lib/canvas-nest/ 부분에서 next는 자신이 적은 테마 폴더에 저장하시면 됩니다.
참고로 전 next-7.7.0 폴더라
themes/next-7.7.0/source/lib/canvas-nest/ 으로 적었습니다.

_config.yml파일의 canvas_nest부분에 수정 해야 합니다.

1
2
3
4
5
6
7
canvas_nest:
enable: true
onmobile: true # Display on mobile or not
color: "50,50,50" # RGB values, 선 색깔 바꿀수 있음 .. RGB values, use `,` to separate
opacity: 0.5 # 선 두께 .. The opacity of line: 0~1
zIndex: -1 # z-index property of the background
count: 49 # 선 개수 .. The number of lines .. max:99

enable : false 부분을 true 으로 바꿔 줍니다. 나머지는 적당히 바꿔줍니다.


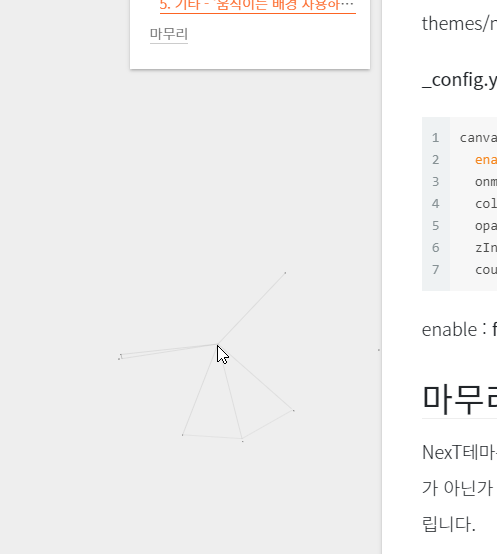
사이트에 접속해보면 마우스에 따라서 무언가가 움직이는 걸 확인할 수 있습니다.

마무리

NexT테마는 아직 이미지부분&마크다운 링크가 맞질않아 수정이 필요하지만 제가 본 테마중에 가장 깔끔한 테마가 아닌가 싶습니다. 앞으로 수정 한 부분이 있으면 이곳에 적겠지만 이 포스터는 개인적인 부분이라 양해 부탁드립니다.